
30 GPT Image 2 Photo-Editing Prompts: Change One Thing, Preserve Everything Else (2026)
Use 30 GPT Image 2 photo-editing prompts to change backgrounds, clothing, lighting, and products while preserving faces, text, and composition.
On this page 48 sections
Key takeaways
For reliable GPT Image 2 edits, request one specific change, name its exact region, and explicitly lock identity, geometry, camera, lighting, text, and every object that must remain unchanged. Make complex edits in separate passes, compare each output with the original, and use a mask when a change repeatedly spreads outside its target area.
Use 30 copy-ready GPT Image 2 photo-editing prompts to change one detail while protecting faces, products, text, lighting, backgrounds, and composition.
The safest way to edit a photo with GPT Image 2 is to describe one allowed change and then explicitly lock every important element that must remain unchanged. A short prompt such as “make the jacket red” leaves the model free to reinterpret the face, crop, lighting, background, and even small objects. A controlled edit prompt closes those doors.
This guide gives you a reusable preservation formula, 30 copy-ready editing prompts, an API example, and a failure-recovery workflow. It is written for GPT Image 2 as documented on July 15, 2026. If you are starting from generation rather than an existing photo, begin with our complete GPT Image 2 prompt guide.
> Accuracy note: GPT Image 2 can preserve image inputs with high fidelity, but generative editing is not a pixel-locking tool. OpenAI still lists consistency and precise composition among the model's limitations. Current research also documents spatial misalignment, texture distortion, and content hallucination in generative image editing. The prompts below reduce drift; they cannot guarantee that every untouched pixel will remain identical.
TL;DR: the best GPT Image 2 photo-editing prompt
Copy this framework and replace the bracketed text:
Edit the attached image.

ONLY CHANGE:
[Describe one specific change in one specific region.]

PRESERVE EXACTLY:
- the same person, facial identity, expression, skin texture, hair, and pose
- the same camera position, lens perspective, framing, crop, and aspect ratio
- the same lighting direction, shadow placement, color grade, and depth of field
- the same background, objects, text, logos, materials, and geometry

Do not redesign, beautify, restyle, recompose, add, remove, or replace anything else.
Return one edited image at the original dimensions.
The key is not the phrase “preserve everything.” The key is naming what “everything” means for this image.
Why one small edit can change the whole image
GPT Image 2 does not work like changing a single Photoshop layer. It interprets your input, your instruction, and the visual context, then generates an edited result. This lets it make natural semantic changes, but it also means unconstrained details can move.
Three kinds of drift are especially common:
- Identity drift: the face, age, hairline, expression, or body proportions change.
- Structural drift: the crop, camera angle, hands, object geometry, typography, or background layout changes.
- Style drift: lighting, contrast, texture, sharpness, or color grading changes even though you did not request it.
The remedy is a narrow edit scope, a preservation list, and a visual comparison after each edit. For repeated characters or people, use the identity controls in our AI face and character consistency guide.
The CONTROL prompt formula
Use CONTROL as a quick pre-edit checklist:
| Letter | Instruction | What it prevents |
|---|---|---|
| C | Change one named element | Competing edits and ambiguity |
| O | Outline the exact region | Changes spreading into nearby areas |
| N | Name every locked feature | Identity, text, product, and scene drift |
| T | Tie the edit to existing perspective and light | Pasted-on or inconsistent results |
| R | Retain dimensions, crop, and composition | Reframing and aspect-ratio changes |
| O | Omit vague style words | Unrequested redesigns |
| L | Look, compare, then make the next edit | Error accumulation |
If you need three changes, make three controlled edits. A sequence of narrow requests is easier to audit than one overloaded prompt.
Before you edit: five details to inspect
Before writing the prompt, note these details from the source image:
- Subject anchor: who or what must remain recognizable?
- Geometry anchor: what shapes, proportions, and positions must not move?
- Camera anchor: what are the framing, angle, lens feel, and depth of field?
- Light anchor: where do the main light, highlights, and shadows come from?
- Brand anchor: which words, labels, logos, packaging marks, or UI elements must remain legible and unchanged?
For portraits, the face and pose are usually the strongest anchors. For products, silhouette, label text, logo placement, cap geometry, reflections, and surface contact matter more. Our AI product photography guide explains how to describe those product anchors in more detail.
1. Background-change prompts
Prompt 1: replace a plain background without changing the person
Edit the attached portrait. Replace only the flat gray background with a softly blurred modern office interior. Preserve exactly the person's facial identity, expression, skin texture, hairstyle, clothing, pose, hands, body proportions, camera angle, crop, lens perspective, lighting on the subject, and depth of field. Match the new background's perspective and brightness to the existing portrait. Do not retouch or restyle the person. Return the original dimensions.
For a ready-made professional portrait setup, open the CEO headshot upgrade prompt.
Prompt 2: change an indoor background to a subway scene
Change only the environment behind the subject to the interior of a late-night subway car with subtle window reflections. Keep the same person, face, expression, hair, pose, clothing, framing, camera height, and foreground lighting. Do not alter the subject's edges or invent accessories. The subway must sit naturally behind the existing subject with matching perspective and depth of field.
Use the late-night subway reflection portrait when you want to build that complete look from scratch.
Prompt 3: replace a studio wall with an operating room
Replace only the background wall with a realistic, softly defocused operating-room environment. Preserve the surgeon's exact identity, scrubs, mask position, posture, hands, lighting, crop, and lens perspective. Keep the subject tack-sharp and do not add medical tools in front of the person. Match the existing cool light without changing skin tone.
See the surgeon portrait in the OR prompt for a complete reference composition.
Prompt 4: change the sky behind a subject
Replace only the visible sky with a dramatic storm sky and one distant lightning strike. Preserve every foreground object, the person's identity and pose, the horizon line, buildings, landscape geometry, camera position, crop, exposure on the subject, and existing shadows. The lightning must remain behind the subject and must not change the foreground lighting.
The storm portrait prompt shows how to make this effect the central concept.
Prompt 5: add seasonal atmosphere without rebuilding the scene
Add only a small number of softly falling cherry blossom petals to the background and midground. Preserve the person's face, hair silhouette, expression, clothing, pose, background layout, camera angle, crop, lighting, and color grade. Do not place petals over the eyes, mouth, hands, or important text. Do not add branches or change the season of any existing object.
Compare the result with the composition cues in the cherry blossom rain portrait.
2. Face, hair, and portrait prompts
Prompt 6: remove a temporary blemish
Edit only the small temporary blemish on the subject's left cheek. Reconstruct natural skin texture that matches the surrounding area. Preserve exact facial identity, pores, freckles, moles, wrinkles, face shape, eyes, nose, lips, expression, hair, lighting, shadows, color, and sharpness. Do not smooth, beautify, reshape, or retouch any other skin.
Prompt 7: tidy flyaway hairs
Remove only the isolated flyaway hairs outside the main hair silhouette. Preserve the original hairstyle, hairline, volume, curl pattern, color, individual strand texture, face, ears, shoulders, background, lighting, crop, and depth of field. Do not make the hair glossy, longer, fuller, or more symmetrical.
Prompt 8: change eye direction, not the face
Change only the direction of both pupils so the subject looks naturally toward the camera. Preserve the exact eye shape, iris color, eyelids, eyelashes, catchlights, facial identity, expression, head angle, skin texture, makeup, hair, lighting, and composition. Do not enlarge the eyes or change the eyebrows.
Prompt 9: close the mouth naturally
Change only the mouth from slightly open to gently closed with a neutral, natural expression. Preserve the person's exact identity, lip shape and color, jawline, cheeks, nose, eyes, skin texture, head position, hairstyle, lighting, camera angle, and crop. Do not change age, face shape, makeup, or expression elsewhere.
Prompt 10: preserve identity while changing the role context
Change only the subject's surrounding context and visible outer garment to a realistic astronaut EVA suit. Preserve the exact face, age, expression, skin texture, hairline, head angle, body pose, camera position, crop, and lens perspective. Fit the suit around the existing body without changing proportions. Do not redesign the face or turn the image into an illustration.
For a complete space composition, use the astronaut EVA portrait prompt. For a related uniform treatment, see the fighter pilot portrait.
3. Clothing and accessory prompts
Prompt 11: recolor one garment
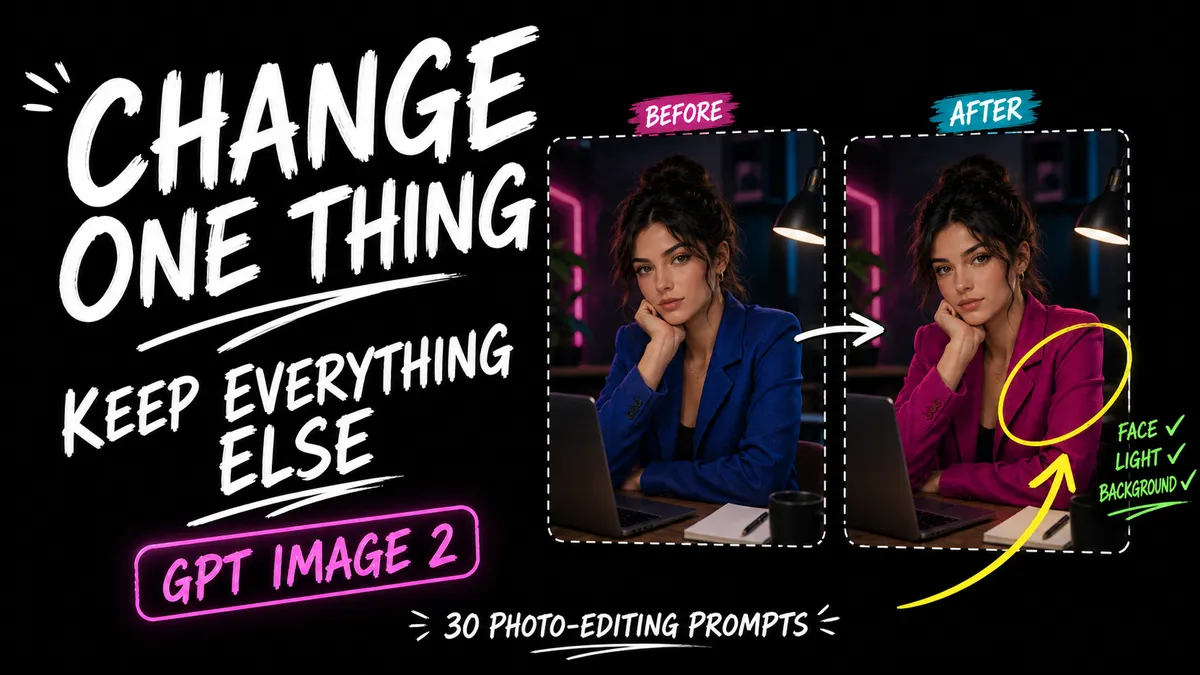
Change only the blue jacket to a deep burgundy red. Preserve its exact cut, seams, folds, zipper, buttons, fabric texture, highlights, shadows, fit, and occlusion behind the arms. Preserve the person's face, hair, skin, pose, hands, other clothing, background, camera, crop, and overall color grade. Do not add patterns or accessories.
Prompt 12: change fabric material
Change only the visible jacket material from matte cotton to dark brown suede. Keep the same jacket design, silhouette, seams, folds, fit, buttons, and position. Preserve the person's identity, pose, hands, shirt, background, framing, lighting direction, and shadows. Render suede texture consistent with the existing light; do not redesign the garment.
Prompt 13: remove one accessory
Remove only the sunglasses resting on top of the subject's head. Reconstruct the small hidden hair area using the surrounding hair's direction, color, and texture. Preserve exact face, hairline, hairstyle, expression, ears, clothing, pose, background, lighting, crop, and every other accessory.
Prompt 14: add one accessory
Add only a simple silver wristwatch to the subject's visible left wrist. Match the wrist angle, scale, perspective, skin contact, reflections, and existing light. Preserve the exact hand, fingers, sleeve, pose, face, body, background, crop, and all other details. Do not add rings, bracelets, logos, or text.
Prompt 15: change one clothing item while keeping the editorial look
Replace only the plain black blazer with an ivory double-breasted blazer. Preserve the subject's exact identity, expression, hair, body proportions, pose, hands, inner shirt, jewelry, background, camera angle, crop, lighting, shadows, and editorial color grade. Keep the new blazer realistic and fitted to the existing pose. Do not change anything above the neckline.
If you want a full fashion concept rather than a restrained edit, use the high-fashion luxury campaign prompt.
4. Product and packaging prompts
Prompt 16: change a product background
Replace only the surface and background behind the perfume bottle with dark charcoal stone and a soft warm gradient. Preserve the exact bottle silhouette, glass thickness, cap geometry, label artwork, logo, all text, liquid color, reflections, camera angle, product scale, crop, and focus. Add only a physically plausible contact shadow and reflections caused by the new surface. Do not redesign the packaging.
Use the luxury perfume bottle prompt to generate a complete campaign scene.
Prompt 17: recolor packaging without damaging the label
Change only the box's solid background color from white to matte midnight blue. Preserve the exact box dimensions, folds, edges, logo, typography, spelling, barcode, icons, label positions, print scale, highlights, shadows, perspective, and background. Do not rewrite, sharpen, move, or invent any text.
Prompt 18: place a portrait on an existing package
Replace only the central illustrated portrait area on the wine label with the supplied portrait photo rendered as a refined monochrome engraving. Preserve the person's recognizable identity and preserve the bottle, label shape, brand name, all existing text, border ornaments, paper texture, glass reflections, background, camera, and lighting. Keep the portrait fully inside the designated label area.
See the portrait on a wine label prompt and portrait on a luxury chocolate box for two packaging-specific layouts.
Prompt 19: change the material of one product component
Change only the watch strap from black leather to brushed stainless steel links. Preserve the exact watch case, dial, hands, hour markers, logo, crown, proportions, wrist position, camera angle, crop, lighting, reflections, background, and depth of field. Match the steel reflections to the existing light. Do not alter the dial.
Use the luxury watch dial portrait or black-label watch campaign prompt when the watch itself is the hero.
Prompt 20: remove a distracting product prop
Remove only the small decorative leaf touching the lower-right edge of the product. Reconstruct the background surface and the product's unobstructed edge using surrounding texture, perspective, reflections, and shadow continuity. Preserve the product, label, logo, text, geometry, lighting, crop, and every other prop exactly.
5. Lighting and color prompts
Prompt 21: correct white balance only
Correct only the overall white balance so neutral objects appear neutral and skin retains a natural tone. Preserve exposure, contrast, highlight roll-off, shadow depth, saturation relationships, facial identity, texture, objects, background, crop, and composition. Do not relight, retouch, sharpen, denoise, or apply a cinematic grade.
Prompt 22: soften harsh facial shadow
Soften only the hard shadow crossing the subject's left cheek, as if a subtle fill light reduced its intensity by about one stop. Preserve the main light direction, catchlights, face, skin texture, expression, hair, clothing, background, overall contrast, camera, crop, and all other shadows. Do not flatten the portrait or brighten the entire image.
Prompt 23: warm a wedding photo
Apply only a restrained warm color grade to the wedding photo: slightly warmer highlights, neutral skin, and clean whites. Preserve both people's exact faces, clothing colors, floral details, background, exposure, contrast, skin texture, crop, and composition. Do not add haze, grain, lens flare, or orange skin.
The wedding and event color-grade prompt is a focused version for this workflow.
Prompt 24: change day ambience to blue hour
Change only the outdoor ambient light from late afternoon to subtle blue hour. Preserve every building, window, object, person, vehicle, sign, text, camera angle, crop, perspective, and geometry. Add believable cool sky ambience and warm practical lights only where fixtures already exist. Do not change the scene layout or create a new sky composition.
Prompt 25: add a premium automotive grade
Change only the color treatment to a premium automotive campaign grade with controlled contrast, clean metallic highlights, and slightly cooler shadows. Preserve the car's exact design, body color, wheels, badges, reflections, background, road, driver, camera angle, crop, and perspective. Do not modify the vehicle or add motion blur.
For a generated campaign rather than an edit, try the sunlit supercar campaign prompt.
6. Object, document, and scene-cleanup prompts
Prompt 26: remove one background object
Remove only the red trash bin in the far-left background. Reconstruct the wall and pavement behind it using the surrounding texture, perspective lines, light, and shadows. Preserve all people, faces, vehicles, architecture, signs, text, foreground objects, camera position, crop, color, and depth of field.
Prompt 27: remove a reflection while preserving glass
Remove only the photographer's reflection from the window glass. Preserve the glass tint, frame, dust, subtle environmental reflections, interior objects, exterior view, perspective, lighting, crop, and image texture. Reconstruct the affected area from adjacent reflections without making the window look empty or opaque.
Prompt 28: straighten a document photo
Correct only the document's perspective so the page is front-facing and rectangular. Preserve every word, number, diagram, line break, signature, stamp, handwriting mark, color, and page edge exactly as visible. Keep the full document in frame. Do not rewrite missing text, summarize content, beautify handwriting, or invent cropped details.
For whiteboards and pages, start with the document and whiteboard scan prompt. Always verify important text against the source after editing.
Prompt 29: clean a real-estate room without redesigning it
Remove only the loose charging cable on the floor beside the sofa. Reconstruct the floor texture and any covered shadow. Preserve the room layout, furniture, architecture, wall art, windows, view, lighting, materials, camera position, lens perspective, crop, and all other objects. Do not stage, redecorate, widen, or brighten the room.
Prompt 30: replace one view outside a window
Replace only the scenery visible through the penthouse windows with a realistic evening city skyline. Preserve the window frames, glass reflections, interior, furniture, people, architecture, camera angle, crop, perspective, lighting on all interior objects, and depth of field. The new skyline must remain entirely behind the glass and match the existing horizon height.
For a full luxury environment concept, see the rooftop penthouse lifestyle campaign and private jet cabin editorial portrait.
How to edit with the GPT Image 2 API
OpenAI documents the Image API as the best fit for a single image edit. The Responses API is more suitable when your application needs conversational, multi-turn editing. Here is a compact Python example for one edit:
from openai import OpenAI
import base64

client = OpenAI()

prompt = """Edit the attached image.
ONLY CHANGE: Change the blue jacket to deep burgundy red.
PRESERVE EXACTLY: facial identity, expression, hair, pose, hands,
garment design and folds, background, lighting, camera angle, crop,
and aspect ratio. Do not change anything else."""

with open("portrait.png", "rb") as source_image:
    result = client.images.edit(
        model="gpt-image-2",
        image=source_image,
        prompt=prompt,
        size="1536x1024",
        quality="high",
    )

image_bytes = base64.b64decode(result.data[0].b64_json)
with open("portrait-edited.png", "wb") as output_file:
    output_file.write(image_bytes)
Keep the API key on your server, not in browser code or a public repository. The current model page lists gpt-image-2-2026-04-21 as a snapshot when an application needs version stability. Check the official model page before production deployment because model availability and behavior can change.
When to use a mask
A mask is useful when the change repeatedly spreads beyond the intended region, such as recoloring a jacket without touching the shirt or removing a prop without rebuilding the product. Mark only the area the model may change, then keep the same preservation instructions in the text prompt.
Do not treat a mask as a hard pixel boundary. OpenAI's documentation describes it as guidance and notes that the model may not follow the mask's exact shape. Leave a little room around the target edge, inspect the seam, and compare the unmasked area with the original.
The safest multi-edit workflow
Use this order when a final image needs several changes:
- Save the untouched source as version 0.
- Make the most structural edit first, such as background replacement.
- Compare identity, geometry, text, and crop with version 0.
- Make one material or clothing change.
- Compare again with version 0, not only with the previous edit.
- Apply color grading last.
- Keep every accepted intermediate version.
This prevents a small error from becoming the source for five more generations. It also lets you return to the last correct version instead of rebuilding the image.
Troubleshooting: why did GPT Image 2 change the wrong detail?
| Problem | Likely cause | Better next prompt |
|---|---|---|
| Face changed | “Same person” was too vague | Name face shape, expression, eyes, skin texture, hairline, and head angle as locked |
| Crop changed | No camera constraints | Preserve original dimensions, crop, camera position, lens perspective, and aspect ratio |
| Product text changed | Text was not treated as protected geometry | Preserve every letter, spelling, line break, logo, scale, and placement; verify manually |
| Edit spread into nearby objects | Target region was vague | Name the object, its location, and the boundary; use a mask if needed |
| Result looks pasted on | New element ignored scene physics | Match scale, perspective, depth of field, contact shadow, reflections, and light direction |
| Image became “cinematic” | Vague quality/style words encouraged redesign | Remove “stunning,” “epic,” “professional,” and similar open-ended style terms |
| Repeated edits keep drifting | Each output became a weaker reference | Return to the last verified version and split the remaining request into single edits |
If you are deciding whether a different generator better matches your workflow, use our GPT Image 2 vs Midjourney V8 vs FLUX 2 vs Krea 2 comparison.
A fast quality-control checklist
Compare the edited output with the source at 100% zoom and answer yes or no:
- Is the requested change present and limited to the correct region?
- Is the person's identity unchanged?
- Are hands, eyes, teeth, hair edges, and accessories intact?
- Is product geometry unchanged?
- Are logos, labels, numbers, and small text still correct?
- Is the camera angle, crop, and aspect ratio unchanged?
- Do light direction, shadows, contact points, and reflections make sense?
- Did any background object appear, disappear, duplicate, or move?
- Does the output still have enough resolution for its intended use?
- Do you have the right to use the source image and any person's likeness?
For likenesses, OpenAI's current service terms require the necessary rights and express consent to reproduce a person's likeness. For commercial work, keep the source, consent record, prompt, model version, and accepted output together.
Final answer
The most reliable GPT Image 2 editing prompt is not the longest one. It is the prompt with the smallest allowed change and the clearest preservation contract. State one edit, define its region, lock identity and composition, match the existing scene physics, and verify the result before making the next request.
Start with the master template, then use the closest prompt above. If the model changes an unrelated detail, do not add five corrective requests to the same drifting output. Return to the last clean version, strengthen the missing lock, and edit again.
Frequently asked questions
What is the best GPT Image 2 prompt for changing only one detail?
How do I stop GPT Image 2 from changing a person's face?
Can GPT Image 2 edit a photo without changing the background?
Should I use one prompt for several photo edits?
Does a mask force GPT Image 2 to change only the selected pixels?
Can GPT Image 2 preserve logos and packaging text?
What is the difference between the Image API and Responses API for editing?
Why does GPT Image 2 change the crop or camera angle?
Can I use a real person's photo with GPT Image 2?
Is GPT Image 2 pixel-perfect for professional retouching?
Sources and further reading
- OpenAI Developers: GPT Image 2 model documentation — https://developers.openai.com/api/docs/models/gpt-image-2
- OpenAI Developers: Image generation and editing guide — https://developers.openai.com/api/docs/guides/image-generation
- OpenAI Service Terms: Visual capabilities and likeness consent — https://openai.com/policies/service-terms/
- OpenAI: ChatGPT Images 2.0 System Card — https://deploymentsafety.openai.com/chatgpt-images-2-0/chatgpt-images-2-0.pdf
- Zhao and Brown (2026): Mitigating Content Shift and Hallucination in GenAI Image Editing via Structural Refinement — https://arxiv.org/abs/2605.30437